The art of sourdough making, a practice rooted in antiquity, involves the fermentation of flour and water by wild yeasts and bacteria. This process yields a leavened bread characterized by its distinct tangy flavor and chewy texture. This guide provides an introduction for individuals new to sourdough baking, outlining the fundamental steps and considerations.
The heart of any sourdough bread is the starter, also known as a levain or mother. This living ecosystem of microorganisms is responsible for both the leavening and the characteristic flavor profile of sourdough.
What is a Sourdough Starter?
A sourdough starter is a symbiotic culture of bacteria, primarily Lactobacillus species, and wild yeasts. These microorganisms consume the carbohydrates in flour, producing carbon dioxide (which creates bubbles and gives the bread its rise) and various organic acids (which contribute to the sour notes and inhibit mold growth). Think of your starter as a miniature, self-sustaining brewery, constantly working to convert sugars into gas and flavor compounds.
Creating Your First Starter
Commencing your sourdough journey typically involves cultivating a starter from scratch. This process requires patience and consistent feeding.
Ingredients for a Starter
- Flour: Unbleached all-purpose flour or whole wheat flour are common choices. Whole wheat flour often contains more wild yeasts naturally, potentially accelerating starter activity.
- Water: Unchlorinated lukewarm water is essential. Chlorine can inhibit microbial growth. Filtered or bottled water is suitable.
Day-by-Day Starter Development
- Day 1: Combine 50 grams of flour and 50 grams of water in a clean glass jar. Mix thoroughly until no dry flour remains. Cover loosely (e.g., with plastic wrap or a cloth secured with a rubber band) to allow air circulation but prevent drying. Store at room temperature (ideally 20-24°C / 68-75°F).
- Day 2: Observe for any signs of activity, such as small bubbles. If no activity, simply leave it. If you see activity, discard half of the starter and feed with 50 grams of flour and 50 grams of water.
- Day 3-7: Continue the feeding process. Each day, discard all but 50 grams of starter and feed it with 50 grams of flour and 50 grams of water. You should begin to see more consistent bubbling, a sour aroma, and the starter doubling or tripling in volume within 4-8 hours after feeding. It should have a consistent, airy texture.
- Maturation: A mature starter will consistently double or triple in size within 4-8 hours after feeding. It will have a pleasant, tangy aroma, not an acrid or yeasty smell. This typically takes 7-14 days. Resist the urge to rush this process; a strong, active starter is the foundation of good sourdough.
Maintaining Your Starter
Once active, your starter requires regular maintenance.
Regular Feeding
For a starter kept at room temperature, daily feeding is necessary. Discard all but a small amount (e.g., 20-50 grams) and feed it with equal parts flour and water by weight. The ratio often used is 1:1:1 (starter:flour:water).
Refrigeration for Infrequent Baking
If you bake less frequently, storing your starter in the refrigerator slows down its metabolism. Feed it as usual, let it bubble for 1-2 hours, then place it in the refrigerator. Feed it once a week, bringing it to room temperature for a few hours before feeding, then returning it to the fridge. Before baking, revive the refrigerated starter with 2-3 consecutive feedings at room temperature until it is consistently active.
Recognizing a Healthy Starter
A healthy starter will be bubbly, smell pleasantly tangy, and consistently rise and fall after feeding. It should float if a small piece is dropped into water. This “float test” indicates sufficient carbon dioxide production. A discolored or moldy starter should be discarded. A thin layer of dark liquid (hooch) on top indicates the starter is hungry; simply pour it off and feed.
If you’re looking to enhance your sourdough baking skills, you might find the article on mastering the art of sourdough particularly helpful. It offers valuable tips for achieving perfect loaves every time, making it a great companion to your sourdough journey. You can read the article here: Mastering the Art of Sourdough: Tips for Perfect Loaves Every Time.
The Basic Sourdough Bread Recipe: A Step-by-Step Approach
Once your starter is robust, you are ready to embark on baking your first loaf. This foundational recipe illustrates the key stages of sourdough bread production.
Essential Ingredients
- Active Sourdough Starter: Your carefully cultivated culture, at its peak activity.
- Flour: High-protein bread flour is often preferred for its gluten-forming properties, contributing to structure. All-purpose flour can also be used.
- Water: Again, unchlorinated water is crucial.
- Salt: Essential for flavor, strengthening gluten, and controlling fermentation.
The Stages of Sourdough Bread Making
The process of sourdough includes several distinct phases, each crucial for developing flavor and structure. Patience is a valuable asset throughout.
1. Autolyse
Combine flour and water (reserving a small amount of water for later) in a large bowl. Mix until no dry flour remains. Cover and let rest for 30 minutes to 1 hour. This step allows the flour to fully hydrate and gluten development to begin before the introduction of salt and starter. Think of it as allowing the building blocks of your bread to settle and pre-assemble.
2. Mixing and Incorporation
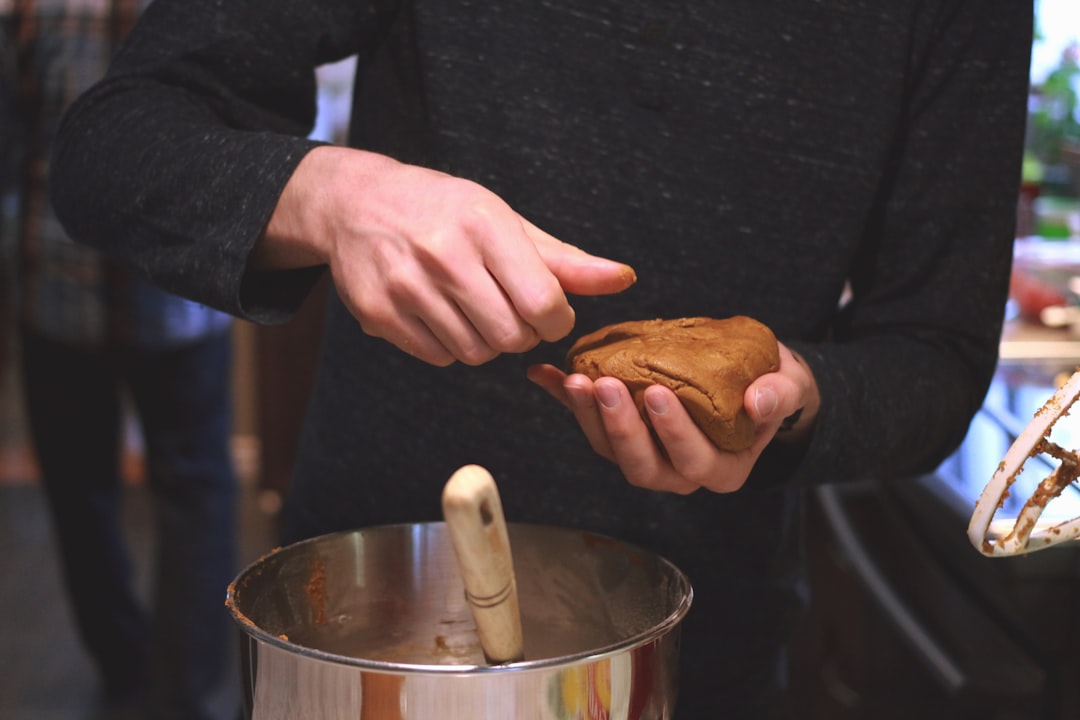
Add the active sourdough starter and salt to the autolysed dough. Mix thoroughly to ensure even distribution. The reserved water can be used here to help incorporate the ingredients. Work the dough gently for a few minutes until everything is well combined. The dough will feel sticky at this point.
3. Bulk Fermentation (First Rise)
This is the longest and most crucial stage, where the starter works its magic, developing flavor and strength in the dough.
Stretch and Folds
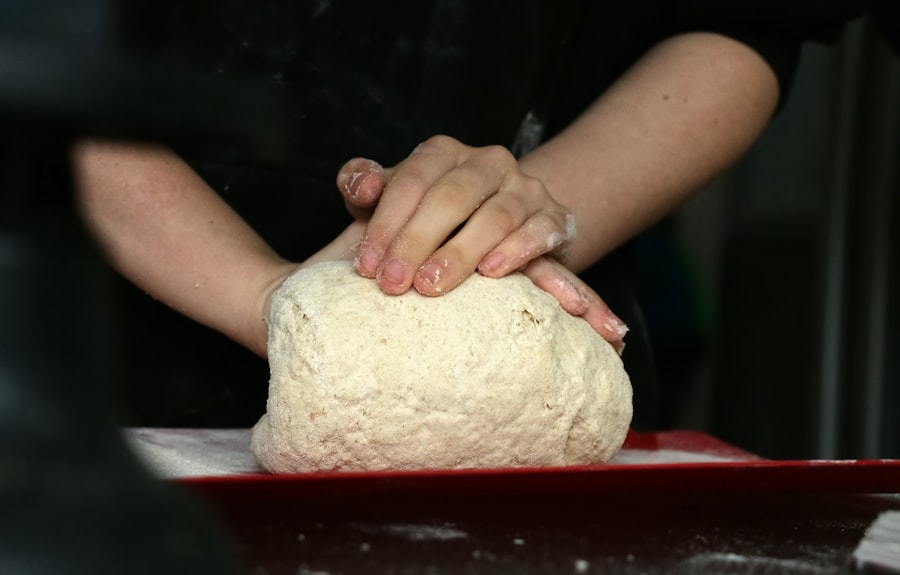
Over the course of 3-5 hours (depending on ambient temperature and starter activity), perform a series of “stretch and folds” every 30-45 minutes. This technique involves gently stretching a portion of the dough up and folding it over itself, rotating the bowl after each fold. This builds gluten structure without the need for extensive kneading. Aim for 3-5 sets of stretches and folds. Visualize this as gently massaging the dough, encouraging its elastic network to form.
Observing the Dough
The dough should increase in volume by 20-50% during bulk fermentation. It will become more airy, bubbly, and smoother. The “jiggle test” can be helpful: gently shake the bowl; the dough should jiggle as a cohesive mass.
4. Pre-Shaping
After bulk fermentation, gently turn the dough out onto a lightly floured surface. Divide it if making multiple loaves. Gently shape the dough into a loose round or oblong shape. This initial shaping helps to build tension and prepares the dough for the final shaping. Let the pre-shaped dough rest for 20-30 minutes, covered, to relax the gluten.
5. Final Shaping
This stage is critical for creating a loaf that holds its shape during baking and achieves a good oven spring. There are various techniques for shaping, but the goal is to create surface tension. For a round loaf (boule), gently fold the edges of the dough towards the center, then flip it over and use the surface of the counter to create tension by pulling the dough towards you in a circular motion. This creates a taut “skin” on the outside of the dough.
6. Cold Proofing (Second Rise)
Place the shaped dough into a floured banneton or a bowl lined with a floured cloth. Cover tightly and refrigerate for 8-16 hours. This slow, cold fermentation further develops flavor, allows the gluten to relax, and makes the dough easier to handle. It also prevents over-proofing at room temperature, which can lead to a dense crumb. This is like putting your bread to sleep, letting it slowly mature in its slumber.
Baking Your Sourdough Loaf
The final act in the sourdough drama is the bake, where the dough transforms into a golden-brown, aromatic loaf.
Essential Equipment
- Dutch Oven: A heavy, lidded pot (cast iron is ideal) traps steam, creating a moist environment crucial for initial oven spring and crust development.
- Parchment Paper: Facilitates transferring the dough into the hot Dutch oven.
- Lame or Sharp Knife: For scoring the dough, which allows for controlled expansion during baking and creates an aesthetic pattern.
The Baking Process
- Preheat Oven and Dutch Oven: Place the Dutch oven with its lid in the oven and preheat to a high temperature, typically 230-260°C (450-500°F), for at least 30-45 minutes. A thoroughly preheated Dutch oven is essential for a good crust.
- Scoring: Carefully remove the cold dough from the refrigerator. Gently invert it onto a piece of parchment paper. Using a lame or sharp knife, make one or more artistic cuts (scores) on the surface of the dough. These scores act as expansion joints, preventing the crust from tearing haphazardly.
- Baking with Lid: Carefully transfer the dough (using the parchment paper as a sling) into the hot Dutch oven. Cover with the lid and bake for 20-30 minutes. The trapped steam prevents the crust from setting too early, allowing for maximum oven spring.
- Baking Without Lid: Remove the lid and continue baking for another 15-25 minutes, or until the crust is deeply golden brown and the internal temperature reaches 93-99°C (200-210°F). Removing the lid allows the crust to crisp and color.
- Cooling: Transfer the baked loaf to a wire rack and allow it to cool completely for at least 1-2 hours before slicing. Slicing too early can result in a gummy texture. This cooling period is critical, allowing the internal structure to set and steam to escape.
Troubleshooting Common Sourdough Issues
Sourdough baking involves many variables, and encountering challenges is part of the learning process. Here are some common issues and their potential remedies.
Dense Crumb or Lack of Rise
- Weak Starter: Ensure your starter is consistently active and bubbly before using it. Feed it adequately and observe its rise and fall.
- Insufficient Bulk Fermentation: The dough needs enough time and warmth to develop gases. Observe the dough for volume increase and the “jiggle” test.
- Over-Proofing: Too much bulk fermentation or final proofing can lead to the gluten structure collapsing. The dough may feel overly slack and lose tension.
- Inadequate Gluten Development: Ensure sufficient stretch and folds during bulk fermentation to build a strong gluten network capable of trapping gases.
- Low Oven Temperature or Insufficient Steam: A hot oven and trapped steam are crucial for initial oven spring. Preheating your Dutch oven thoroughly is vital.
Gummy Texture
- Under-baking: Ensure the loaf is baked to an internal temperature of 93-99°C (200-210°F). Baking longer than the stated time may be necessary depending on your oven.
- Slicing Too Soon: Always allow the loaf to cool completely on a wire rack before slicing. The internal structure truly sets during this cooling period.
- Excessive Hydration: While high hydration doughs can be desirable, overly wet dough can be difficult to manage and may contribute to a gummy texture if not handled correctly.
Pale or Soft Crust
- Insufficient Baking Time: The crust needs sufficient time and heat to develop color and crispness.
- Low Oven Temperature: Ensure your oven is accurately calibrated and preheated to the recommended temperature.
- Not Removing Dutch Oven Lid: The lid removal during the final stages of baking allows the crust to dehydrate and brown.
Starter Issues
- No Activity: Ensure your water is unchlorinated and warm. Try using whole wheat flour for a few feedings to boost microbial activity. Maintain a consistent room temperature.
- Foul Smell: An acrid or unpleasant smell usually indicates an imbalance in the microbial culture. Try discarding more and feeding with fresh flour and water. If mold appears, discard the entire starter.
- Hooch: A layer of dark liquid on top indicates a hungry starter. Simply pour it off and feed.
If you’re looking to enhance your sourdough baking skills, you might find it helpful to explore a related article that delves into the science behind fermentation. Understanding the fermentation process can significantly improve your bread-making results. For more insights, check out this informative piece on sourdough techniques at Sourdough Calculator. This resource offers valuable tips and tricks that can elevate your baking experience.
The Journey of Sourdough: A Continuous Learning Process
| Metric | Typical Value | Unit | Notes |
|---|---|---|---|
| Hydration Level | 65-75 | % | Ratio of water to flour by weight |
| Fermentation Time | 4-12 | hours | Bulk fermentation at room temperature |
| Starter Feeding Ratio | 1:1:1 to 1:5:5 | starter:flour:water | Varies by recipe and starter strength |
| Proofing Time | 2-4 | hours | Final rise before baking |
| Baking Temperature | 230-250 | °C | Oven temperature for crust development |
| Starter Refresh Frequency | 12-24 | hours | Time between feedings to keep starter active |
| Salt Percentage | 1.8-2.2 | % | Percentage of flour weight |
| Bulk Fermentation Temperature | 21-26 | °C | Ideal temperature range for fermentation |
Sourdough baking is a skill that develops with practice and observation. Each batch of dough, each starter, and even environmental factors like ambient temperature can influence the outcome. Embrace experimentation and consider each loaf an opportunity for learning. The tactile experience of working with dough, the anticipation of oven spring, and the satisfaction of a perfectly baked loaf are inherent rewards in this ancient culinary art. Do not be discouraged by initial imperfections; the journey itself holds significant value.