Baking a great loaf of sourdough in a conventional home oven is absolutely achievable, and it doesn’t require specialized, expensive equipment beyond a Dutch oven or a baking stone. The core idea is to recreate a steamy, enclosed environment similar to a professional baker’s oven, which is crucial for developing a beautiful crust and an open crumb. This guide will walk you through the process, focusing on practical steps and common challenges you might encounter.
To bake good sourdough, you first need a healthy sourdough starter. This living culture of wild yeasts and bacteria is what leavens your bread and gives it its distinctive flavor.
The Role of Your Starter
Your starter needs to be active and happy. This means feeding it regularly (usually once or twice a day if kept at room temperature, less if refrigerated) and ensuring it doubles or triples in size consistently within a few hours of feeding. A strong starter is bubbly, floats in water, and smells pleasantly yeasty and sour, not like nail polish remover.
Key Ingredients
Beyond your starter, you’ll need flour (bread flour is often recommended for its higher protein content, but a mix with all-purpose works well too), water, and salt. That’s it! Avoid bleached flours, as the bleaching process can negatively impact gluten development and flavor.
If you’re looking to enhance your sourdough baking skills, you might find the article on mastering the art of sourdough particularly helpful. It offers valuable tips for achieving perfect loaves every time, which can be especially beneficial when using a sourdough bread oven. To read more about these techniques, check out the article here: Mastering the Art of Sourdough: Tips for Perfect Loaves Every Time.
The Sourdough Baking Process: A Step-by-Step Guide
Baking sourdough is a journey that often takes two days, sometimes more, depending on your schedule and fermentation times. Patience is key.
Autolyse and Mixing
We start with an autolyse – mixing flour and water and letting it rest. This allows the flour to fully hydrate and gluten to begin developing without interference from salt or starter. Typically, this lasts 30 minutes to an hour.
After the autolyse, incorporate your active starter and knead gently until fully combined. A little stretching and folding at this stage helps. Finally, add the salt and mix thoroughly. Salt can inhibit yeast activity, so adding it last ensures the starter has a head start.
Bulk Fermentation (First Rise)
This is where the magic happens. Bulk fermentation, or bulk proofing, is the longest rise and crucial for flavor development and crumb structure. During this period, you’ll perform a series of “stretch and folds.”
- Stretch and Folds Explained: Every 30-60 minutes for the first 2-3 hours of bulk fermentation, you’ll gently stretch a portion of the dough up and fold it over itself. Rotate the bowl and repeat until all sides have been folded. This builds strength, develops gluten, and redistributes nutrients for the yeast.
- Knowing When It’s Ready: The dough should increase in volume by 30-50%, feel aerated and bubbly, and jiggle like a firm jelly when you shake the bowl. This can take anywhere from 4 to 8 hours at room temperature (around 70-75°F/21-24°C), or even longer in cooler conditions. Over-fermenting leads to a gummy, flat loaf, while under-fermenting results in a dense crumb.
Shaping and Cold Proofing (Second Rise)
Once bulk fermentation is complete, gently turn the dough out onto a lightly floured surface. You want to handle it minimally to preserve the developed gas.
- Pre-shaping: Gently shape the dough into a loose round or rectangle. Let it rest for 20-30 minutes, covered, to relax the gluten. This makes final shaping easier.
- Final Shaping: Shape your dough into its final form, typically a boule (round) or a batard (oval). The goal is to create tension on the surface of the dough, which will help it hold its shape and expand upwards in the oven. There are many techniques; choose one that feels comfortable.
- Cold Proofing: Transfer the shaped dough into a floured banneton (a proofing basket) or a bowl lined with a floured towel, seam-side up. Cover it and refrigerate for 12-24 hours (or even up to 36 hours). Cold proofing slows down fermentation, develops deeper flavors, and makes the dough easier to handle and score. It also allows you to bake on your schedule.
Baking in a Conventional Home Oven
This is where many home bakers hit a snag, as home ovens don’t typically generate the steam professional ovens do. The solution? Create your own steam chamber.
The Dutch Oven Method
This is widely considered the best method for home bakers. A heavy cast-iron Dutch oven (or any oven-safe pot with a lid) traps the steam released by the dough, mimicking a commercial steam-injected oven.
- Preheating is Crucial: Place your Dutch oven with its lid in your oven and preheat to a high temperature, typically 450-500°F (230-260°C), for at least 30-60 minutes. This ensures the pot is scorching hot, which provides an immediate burst of heat to the dough, aiding oven spring.
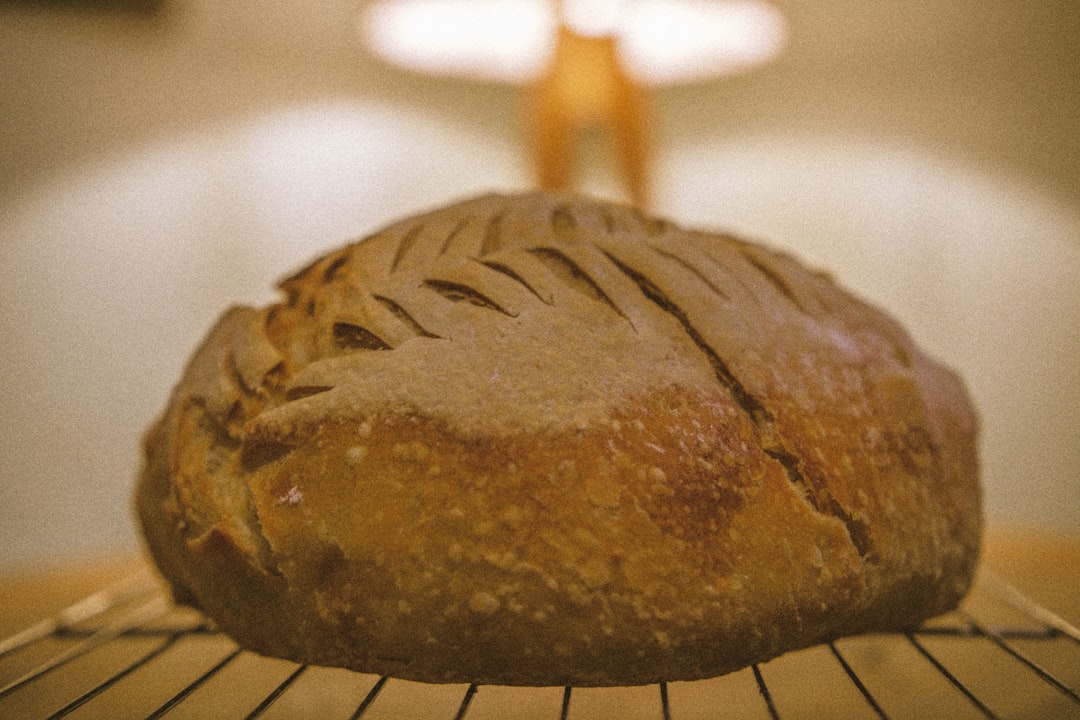
- Transferring and Scoring: Carefully remove the hot Dutch oven from the oven. Gently invert your cold-proofed dough into the Dutch oven. Using a Lame (a specialized razor blade on a stick) or a very sharp knife, score the top of your dough. A single deep score or a more intricate pattern allows the dough to expand predictably and prevents blowouts.
- Baking with the Lid On: Bake with the lid on for 20-30 minutes. This traps the steam, keeping the crust soft and pliable, allowing the loaf to expand fully before the crust sets.
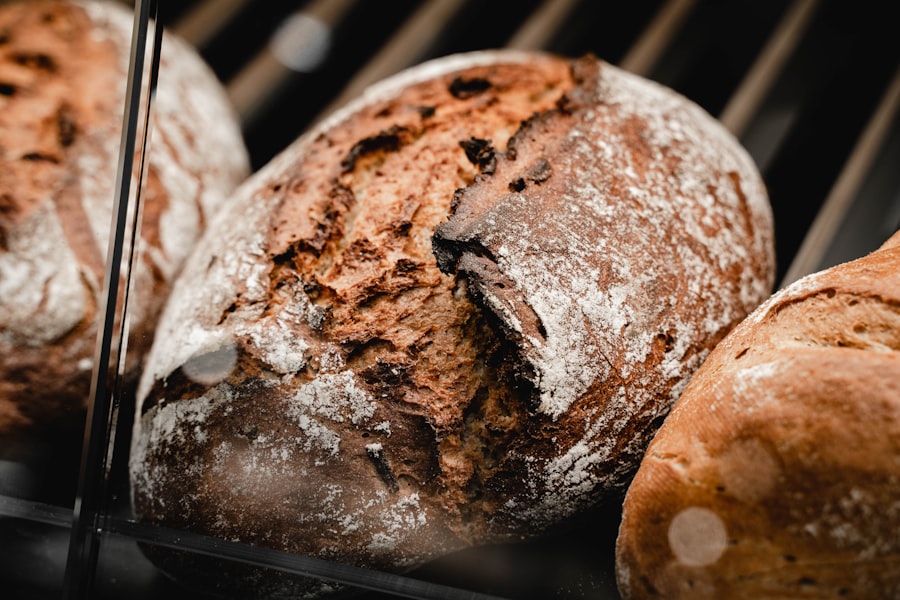
- Baking with the Lid Off: Remove the lid and continue baking for another 20-30 minutes, or until the crust is deeply golden brown and the internal temperature reaches 200-210°F (93-99°C). The absence of the lid allows the crust to crisp up and attain its desired color.
Baking Stone with Steam
If you don’t have a Dutch oven, a baking stone (or a heavy baking steel) can be used, but you’ll need to actively create steam in your oven.
- Preheating the Stone: Place your baking stone on the middle rack and preheat your oven to 450-500°F (230-260°C) for at least an hour to ensure the stone is thoroughly heated.
- Creating Steam: Just before you load the bread, place a pan of hot water or ice cubes on the bottom rack of your oven. Be cautious when adding water to a hot pan, as it will instantly generate a lot of steam. You can also spray the oven walls with water, though this is less effective and can damage some ovens.
- Loading the Dough: Carefully transfer your scored dough onto the hot baking stone.
- Baking Time: Bake for 20-25 minutes with steam, then remove the steam source and continue baking for another 20-30 minutes, or until golden brown and cooked through. Be mindful that without a sealed environment, maintaining consistent steam can be tricky, and your results might vary compared to the Dutch oven method.
Post-Baking and Troubleshooting
The journey doesn’t end when the bread comes out of the oven. Proper cooling is just as important.
Cooling Your Loaf
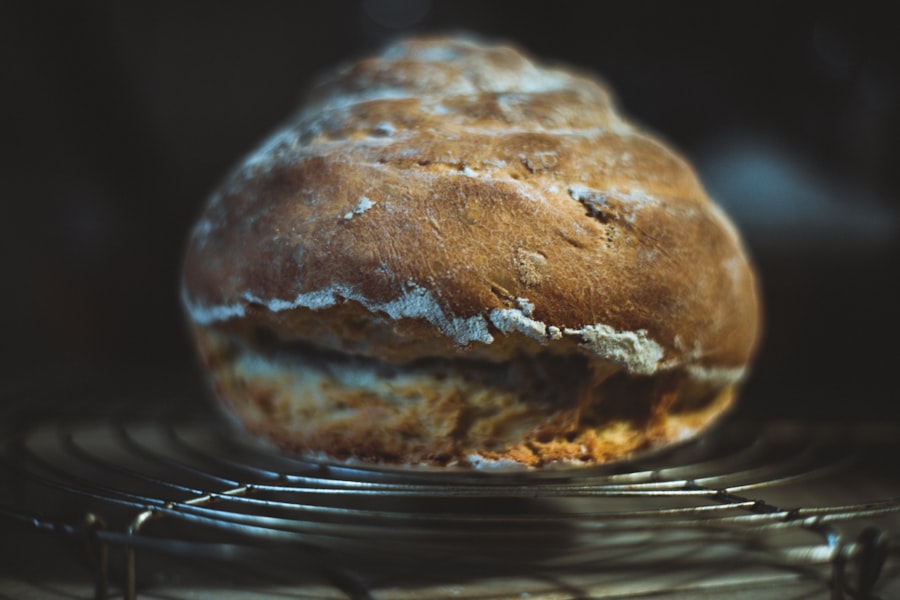
As tempting as it is, do not cut into a hot loaf. The bread is still cooking as it cools, and cutting it too early can result in a gummy interior. Transfer the finished loaf to a wire rack and let it cool completely for at least 1-2 hours. This allows the internal moisture to redistribute and the crumb to set properly.
Common Sourdough Issues and Solutions
Even experienced bakers have off days. Here are some common problems and why they might be happening:
- Flat Loaf, Dense Crumb:
- Underproofed: Didn’t bulk ferment long enough, or cold proofing too short causing insufficient gas production.
- Overproofed: Bulk fermented too long, or left in the fridge too long for the starter’s strength, causing the gluten structure to collapse.
- Weak Gluten Development: Not enough stretch and folds, or using low-protein flour.
- Improper Shaping: Not enough tension created during shaping.
- Weak Starter: Your starter wasn’t active enough.
- Pale Crust:
- Too Low Oven Temperature: Increase oven temperature.
- Not Enough Baking Time: Bake longer, or in the open part of the Dutch oven.
- Not Enough Sugar in Dough: While sourdough doesn’t typically have added sugar, sometimes a small amount (like malted barley flour) can help with crust color.
- Crust Too Thick/Hard:
- Not Enough Steam: Crucial for allowing the crust to remain pliable during initial expansion.
- Oven Too Hot for Too Long: Reduce temperature slightly or shorten baking time.
- Gummy Interior:
- Underbaked: Internal temperature didn’t reach 200-210°F (93-99°C).
- Cut Too Soon: Patience is key.
- Overproofed: The gluten structure is weak and collapsed.
If you’re looking to enhance your sourdough baking experience, you might find the article on the importance of a quality sourdough bread oven particularly insightful. It discusses how the right oven can significantly impact the crust and overall texture of your bread. For more information, check out this helpful resource that delves into various baking techniques and tips for achieving the perfect loaf.
Storing Your Sourdough
| Temperature Range | Baking Time | Humidity Level |
|---|---|---|
| 400°F – 450°F | 30-40 minutes | 70% – 80% |
Sourdough keeps well thanks to its natural acidity.
Short-Term Storage
For 1-2 days, simply store your loaf cut-side down on a cutting board, or wrapped in a clean kitchen towel. Avoid plastic bags at room temperature, as they can soften the crust.
Longer-Term Storage
For anything longer, slice the loaf and freeze the slices in an airtight freezer bag. You can then toast individual slices from frozen, which is a fantastic way to enjoy fresh sourdough whenever you want it. A whole loaf can also be frozen, wrapped tightly in plastic wrap and then foil, and thawed at room temperature before reheating in a moderate oven.
Baking sourdough is a journey of learning and adaptation. Your environment, your starter, and even the flour you use will influence the outcome. Don’t be discouraged by less-than-perfect loaves. Each bake provides valuable insights that will help you refine your technique and eventually produce that perfect loaf you envision. Enjoy the process!