Thinking about diving into sourdough baking? It’s a rewarding journey, and yes, you absolutely can bake delicious sourdough in any kitchen, no fancy equipment required. The core of sourdough baking is your starter – a living culture of wild yeasts and bacteria that ferments and leavens your dough. Once you have a healthy, active starter, the rest is mostly about patience and understanding a few basic techniques. This article will walk you through some versatile recipes, suitable for various skill levels and kitchens, focusing on practical advice rather than chasing perfection.
What is a Sourdough Starter?
Simply put, it’s a fermented mix of flour and water. The wild yeasts and bacteria naturally present in flour and the air around us colonize this mixture, consuming the sugars and producing gas (which makes your bread rise) and lactic and acetic acids (which give sourdough its characteristic tangy flavor).
Feeding Your Starter
Before you start baking, ensure your starter is active and bubbly. This usually means feeding it 4-12 hours before you plan to mix your dough. A common feeding ratio is 1:1:1 (starter:water:flour by weight). So, if you have 50g of starter, discard all but 50g, mix it with 50g of water, and 50g of bread flour. Stir well, cover loosely, and let it sit at room temperature until it doubles in size and has a good amount of bubbles. This indicates it’s ready to use.
Essential Equipment (You Probably Already Have Most of It)
You don’t need a stand mixer or a proofing box. Most sourdough bakers get by with:
- A large mixing bowl: For combining ingredients.
- A kitchen scale: Essential for accurate measurements, especially with sourdough.
- A Dutch oven or heavy-bottomed pot with a lid: For baking bread with a good crust. If you don’t have one, a baking sheet and a pan of water in the oven can work too.
- A clean kitchen towel or plastic wrap: For covering dough during proofing.
- A sharp knife or a bread lame: For scoring the dough.
- Parchment paper: Makes transferring dough easier and prevents sticking.
If you’re looking to enhance your sourdough baking skills, you might find this article on the science of sourdough fermentation particularly insightful. It delves into the intricacies of how different ingredients and environmental factors affect the fermentation process, ultimately influencing the flavor and texture of your bread. To explore this fascinating topic further, check out the article here: The Science of Sourdough Fermentation.
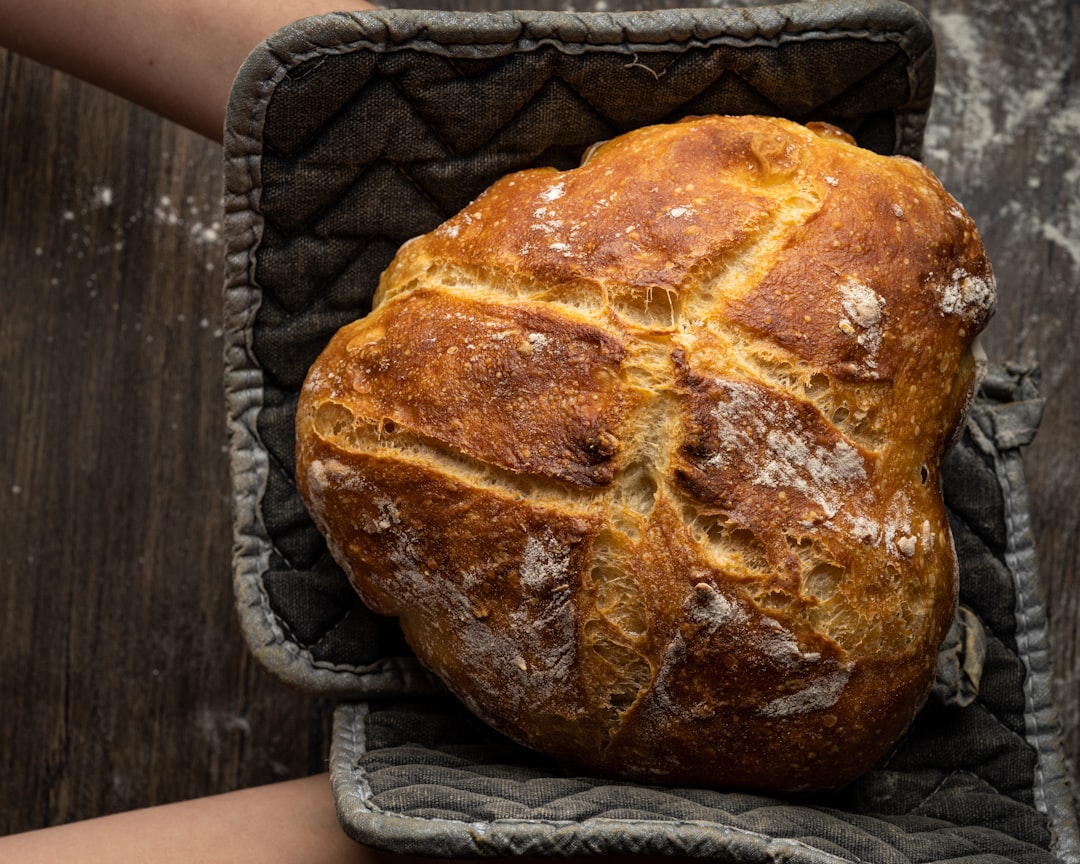
Your First Loaf: The Classic Sourdough Boule
If you’re new to sourdough, a simple boule is an excellent starting point. It’s forgiving and allows you to practice fundamental techniques.
Ingredients
- 100g active sourdough starter
- 350g warm water (around 90-95°F / 32-35°C)
- 500g strong bread flour (unbleached)
- 10g fine sea salt
Method
- Mixing (Autolyse): In a large bowl, combine the warm water and starter. Mix until the starter is mostly dissolved. Add the bread flour and mix gently with your hands or a sturdy spoon until no dry pockets of flour remain. Don’t worry about developing gluten yet. Cover the bowl and let it rest for 30-60 minutes. This process, called autolyse, helps the flour absorb water and begin gluten development.
- Adding Salt: After the autolyse, sprinkle the salt over the dough. Incorporate it by gently squeezing and folding the dough for a few minutes. The dough will feel a bit shaggy at first.
- Bulk Fermentation (Bulk Proof): This is the longest and most crucial stage. Over the next 3-4 hours (depending on your kitchen temperature and starter strength), you’ll perform a series of gentle folds.
- Stretch and Folds: Every 30-45 minutes, lightly wet your hands. Grab a portion of the dough from one side, stretch it upwards, and fold it over to the opposite side. Rotate the bowl and repeat this 3-4 times. This builds gluten strength.
- Dough Characteristics: By the end of bulk fermentation, your dough should be noticeably more elastic, slightly gassy, and have increased in volume by about 20-30%. A good ‘windowpane test’ (stretching a small piece of dough thin enough to see light through without tearing) indicates good gluten development.
- Preshape: Gently turn the dough out onto a lightly floured surface. Fold the edges of the dough towards the center to form a rough ball. Let it rest, uncovered, for 20-30 minutes. This allows the gluten to relax.
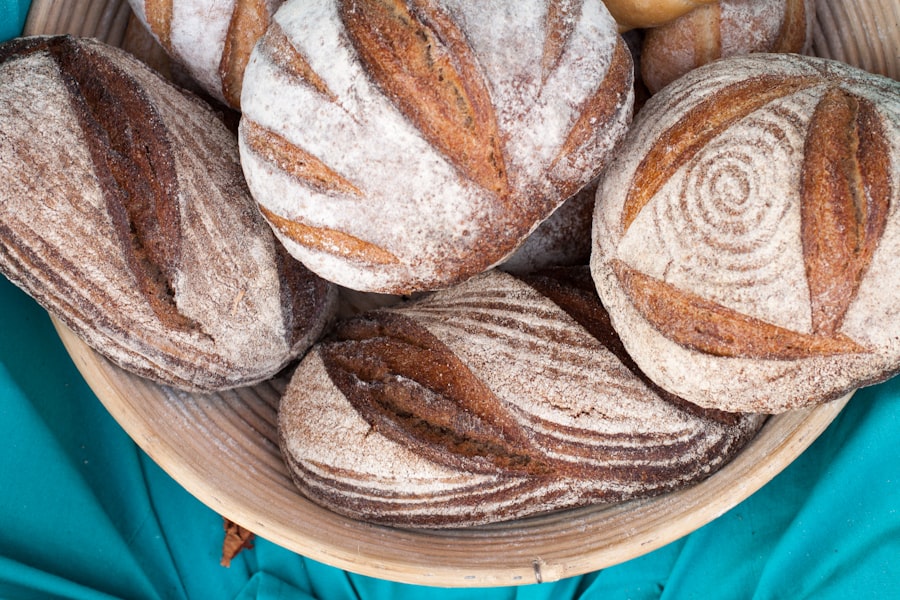
- Final Shape: Lightly flour your work surface. Gently shape the dough into a tight boule (round) or batard (oval). The goal is to create surface tension without deflating the dough. You can find many good video tutorials online for shaping techniques.
- Cold Fermentation (Cold Proof): Place your shaped dough seam-side up in a floured proofing basket (banneton) or a bowl lined with a floured kitchen towel. Cover with plastic wrap and refrigerate for 12-24 hours. Cold fermentation slows down the yeast activity, deepening flavor and making the dough easier to handle.
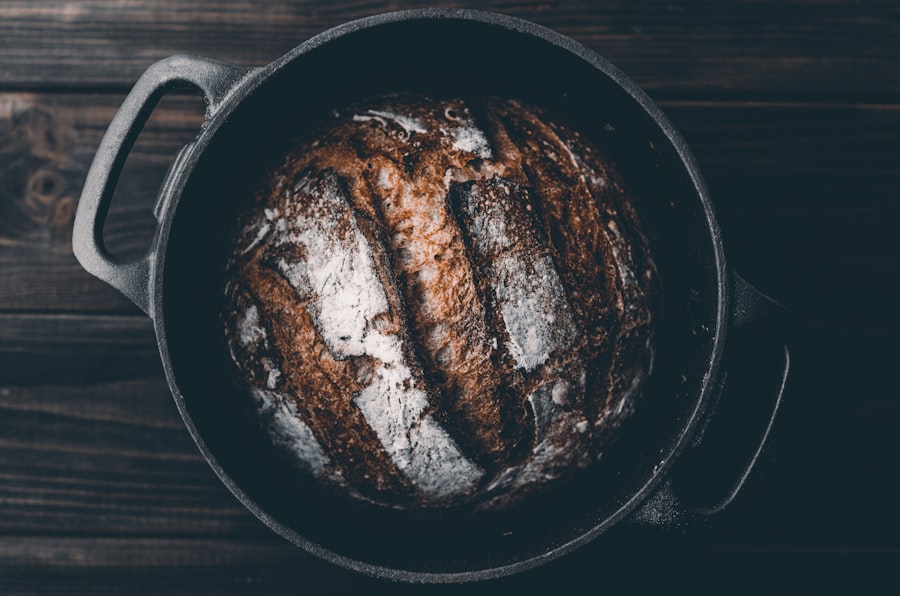
- Baking:
- Preheat your oven to 475°F (245°C) with your Dutch oven (or baking pot) inside for at least 30 minutes.
- Carefully remove the hot Dutch oven from the oven. Gently invert your cold dough into the hot pot (you might want to use parchment paper for easier transfer).
- Score the top of the dough with a sharp knife or lame. A single deep score across the top allows the bread to expand.
- Cover the Dutch oven and bake for 20 minutes.
- Remove the lid, reduce the oven temperature to 450°F (232°C), and bake for another 25-35 minutes, or until the crust is deeply golden brown.
- Let the bread cool completely on a wire rack before slicing. This is crucial for its texture and flavor.
Beyond the Boule: Simple Sourdough Focaccia
Sourdough focaccia is a fantastic option if you want less fuss with shaping and a delicious, airy result. It’s often more forgiving than a traditional loaf.
Ingredients
- 100g active sourdough starter
- 400g warm water (around 90-95°F / 32-35°C)
- 500g all-purpose flour or bread flour
- 10g fine sea salt
- 2 tablespoons olive oil, plus more for the pan
- Optional toppings: flaky sea salt, fresh rosemary, cherry tomatoes, olives
Method
- Mixing: In a large bowl, combine the starter and warm water. Stir until the starter is mostly dissolved. Add the flour and salt. Mix with a spoon or your hands until a shaggy dough forms and no dry spots remain. Add the 2 tablespoons of olive oil and mix it in. The dough will be very wet and sticky. Cover the bowl and let it rest for 30 minutes.
- Bulk Fermentation with Folds: This dough relies on a series of stretch and folds to develop gluten.
- First Fold: After 30 minutes, lightly oil your hands. Perform a series of 4-5 stretch and folds directly in the bowl. Cover and rest for 30 minutes.
- Repeat Folds: Repeat the stretch and fold process 2-3 more times, resting for 30 minutes between each set. The dough will become smoother and more elastic with each fold.
- Final Rest: After the last set of folds, cover the bowl and let it rest at room temperature for another 1-2 hours, until it has expanded slightly and looks bubbly.
- Cold Fermentation (Optional but Recommended): Lightly grease a 9×13 inch baking pan (or similar size) with olive oil. Gently pour or scrape the dough into the prepared pan, trying not to deflate it too much. Drizzle a little more olive oil over the top, cover the pan tightly with plastic wrap, and refrigerate for 12-24 hours.
- Proofing and Dimpling:
- Take the focaccia out of the fridge at least 2-3 hours before baking to allow it to come to room temperature and proof further. It should look bubbly and slightly puffy.
- Preheat your oven to 425°F (220°C).
- Once the dough is at room temperature and nicely proofed, drizzle a generous amount of olive oil over the top. Using oiled fingertips, gently dimple the entire surface of the dough, trying to create small indentations without tearing the dough.
- Add your desired toppings at this stage (rosemary, flaky sea salt, etc.).
- Baking: Bake for 25-35 minutes, or until the focaccia is golden brown on top and the edges are crispy. Allow to cool slightly before slicing and serving.
Quick Sourdough Discard Scallion Pancakes
Wondering what to do with your sourdough discard? These savory pancakes are a delicious, quick way to use it up without much fuss. No long proofing times here!
Ingredients
- 1 cup (240g) unfed sourdough discard (straight from the fridge is fine)
- 1/2 cup (120ml) water
- 1 cup (120g) all-purpose flour
- 1/2 teaspoon salt
- 1/4 teaspoon baking powder (optional, for extra fluffiness)
- 2-3 scallions (green onions), thinly sliced
- 1 tablespoon sesame oil, plus more for cooking
Method
- Combine Ingredients: In a medium bowl, whisk together the sourdough discard, water, flour, salt, and baking powder (if using) until just combined. Don’t overmix; a few lumps are fine.
- Add Scallions and Sesame Oil: Stir in the sliced scallions and 1 tablespoon of sesame oil.
- Cook Pancakes: Heat a non-stick skillet or cast-iron pan over medium heat. Add a little sesame oil or neutral cooking oil.
- Portion and Fry: Pour about 1/4 cup of batter per pancake onto the hot skillet. Cook for 2-3 minutes per side, until golden brown and cooked through.
- Serve: Enjoy immediately with a dipping sauce like soy sauce, rice vinegar, and a dash of chili oil.
If you’re looking to enhance your sourdough baking skills, you might find it helpful to explore some expert tips and techniques. A great resource is the article on mastering the art of sourdough, which offers valuable insights for achieving perfect loaves every time. You can check it out here. This guide complements various sourdough baking recipes by providing essential advice on fermentation, hydration levels, and shaping, ensuring that your baking experience is both enjoyable and successful.
Sweet Treat: Sourdough Crumb Cake
| Recipe Name | Difficulty Level | Preparation Time | Baking Time |
|---|---|---|---|
| Classic Sourdough Bread | Intermediate | 12 hours | 45 minutes |
| Sourdough Baguettes | Advanced | 14 hours | 30 minutes |
| Sourdough Pizza Crust | Beginner | 10 hours | 15 minutes |
Sourdough isn’t just for savory breads. This crumb cake uses discard for a tender, flavorful cake, topped with a generous streusel.
Ingredients
- For the Crumb Topping:
- 1/2 cup (113g) unsalted butter, melted
- 1/2 cup (100g) granulated sugar
- 1/2 cup (100g) light brown sugar, packed
- 1 1/2 cups (180g) all-purpose flour
- 1 teaspoon ground cinnamon
- 1/4 teaspoon salt
- For the Cake:
- 1 cup (240g) unfed sourdough discard
- 1/2 cup (113g) unsalted butter, softened
- 1 cup (200g) granulated sugar
- 2 large eggs
- 1 teaspoon vanilla extract
- 1 3/4 cups (210g) all-purpose flour
- 1 teaspoon baking soda
- 1/2 teaspoon salt
- 1/2 cup (120ml) milk (any kind)
Method
- Prepare Crumb Topping: In a medium bowl, combine the melted butter, granulated sugar, brown sugar, flour, cinnamon, and salt. Mix with a fork until large crumbs form. Set aside.
- Prepare Cake Batter:
- Preheat oven to 350°F (175°C). Grease and flour a 9×13 inch baking pan.
- In a large bowl, cream together the softened butter and granulated sugar until light and fluffy.
- Beat in the eggs one at a time, then stir in the vanilla extract.
- Add the sourdough discard and mix until just combined.
- In a separate bowl, whisk together the flour, baking soda, and salt.
- Gradually add the dry ingredients to the wet ingredients, alternating with the milk, beginning and ending with the dry ingredients. Mix until just combined; do not overmix.
- Assemble and Bake:
- Spread the cake batter evenly into the prepared baking pan.
- Evenly sprinkle the crumb topping over the batter.
- Bake for 35-45 minutes, or until a wooden skewer inserted into the center of the cake comes out clean.
- Cool: Let the cake cool in the pan on a wire rack before slicing and serving.
Sourdough Pizzas: Overnight Dough for Easy Weeknight Meals
A sourdough pizza dough that ferments overnight is a game-changer. It develops great flavor and texture, making for superior homemade pizza.
Ingredients
- 100g active sourdough starter
- 300g warm water (around 90-95°F / 32-35°C)
- 450g bread flour or ’00’ pizza flour
- 10g fine sea salt
- 1 tablespoon olive oil (plus more for bowls)
Method
- Mix Dough: In a large bowl, combine the starter, warm water, flour, salt, and 1 tablespoon of olive oil. Mix with your hands or a sturdy spoon until all the flour is hydrated and a shaggy dough forms.
- Overnight Bulk Fermentation: Lightly oil another large bowl. Transfer the dough to the oiled bowl, cover it with plastic wrap, and refrigerate for 12-24 hours. The long, cold fermentation develops flavor and makes the dough very easy to work with.
- Divide and Warm Up: About 2-3 hours before you plan to bake, take the dough out of the fridge. Gently divide it into 2-3 equal portions (depending on desired pizza size). Shape each portion into a tight ball, place them on a lightly floured surface or individual oiled containers, and cover loosely. Let them sit at room temperature to warm up. They should become puffy and bubbly.
- Preheat Oven and Pizza Stone/Steel: Preheat your oven to its highest setting (usually 500-550°F / 260-290°C) with a pizza stone or steel inside for at least 45 minutes to an hour. If you don’t have a stone, an inverted baking sheet works.
- Shape Pizza: Lightly flour your work surface and your hands. Take one dough ball and gently stretch it into your desired pizza shape. Avoid using a rolling pin if possible, as it can deflate the air bubbles. Focus on working from the center outwards, leaving a slightly thicker crust.
- Top and Bake:
- Carefully transfer the shaped dough to a pizza peel or the back of a baking sheet dusted with semolina flour or regular flour (this helps it slide off).
- Quickly add your desired sauce, cheese, and toppings. Don’t overload it.
- Carefully slide the pizza onto the preheated pizza stone or baking sheet in the oven.
- Bake for 8-15 minutes, depending on your oven and toppings, until the crust is golden brown and the cheese is bubbly and slightly charred.
- Remove from the oven, let cool for a minute or two, then slice and serve.
Troubleshooting and Tips for Success
Sourdough baking has a learning curve, but most issues are solvable. Don’t be discouraged by an imperfect loaf.
My Starter Isn’t Bubbly
- Patience: Starters can take time to become active, especially new ones.
- Temperature: A warmer room (75-80°F / 24-27°C) helps.
- Consistency: Feed regularly.
- Flour Quality: Use unbleached flour, preferably bread flour or whole wheat for feeding.
My Dough is Too Sticky
- Hydration: Some sourdough recipes are designed for high hydration (more water), which naturally makes sticky dough.
- Gluten Development: Ensure you’re doing enough stretch and folds during bulk fermentation to build strength.
- Flour Type: Different flours absorb water differently. You might need to adjust water slightly.
- Technique: Use wet hands for handling sticky dough, and a bench scraper is your friend.
- Cold Dough: Chilled dough is always easier to handle.
My Bread Did Not Rise (Dense Crumb)
- Weak Starter: Your starter wasn’t active enough when you used it.
- Underproofed: The dough didn’t have enough time during bulk fermentation or cold proofing to develop enough gas.
- Overproofed: The dough fermented too long, and the gluten structure collapsed. This can be harder to diagnose but results in a “gummy” texture.
- Shaping Issues: Not building enough tension during shaping can lead to a flatter loaf.
- Oven Spring: Ensure your oven is hot enough and you’re baking in a covered vessel (like a Dutch oven) initially to trap steam for maximum oven spring.
My Crust Isn’t Crispy
- Steam is Key: Baking in a Dutch oven or with a pan of water in the oven creates the steam needed for a good crust.
- Baking Time: Make sure you’re baking long enough for the crust to fully dry out and crisp up after you remove the lid (if using one).
- Cooling: Always cool on a wire rack to prevent a soggy bottom.
Sourdough baking is a journey of learning and adaptation. Each bake will teach you something new about your starter, your ingredients, and your kitchen environment. Enjoy the process and the delicious results!