Sourdough baking represents an enduring tradition in culinary history. It utilizes a natural leavening agent, a “starter,” rather than commercial baker’s yeast, to ferment dough and produce bread. This process imparts a distinct tangy flavor, chewier texture, and often a more digestible product compared to breads made with commercial yeast. The art of sourdough baking is both a science, relying on the careful cultivation of microbial ecosystems, and an craft, requiring patience and observation.
The origins of sourdough are ancient, predating the isolation and commercial production of single-strain yeasts. Evidence suggests early civilizations in the Fertile Crescent and Egypt employed similar fermentation techniques for bread production. This method has persisted through millennia, adapting to various cultures and climates, and experiencing a resurgence in contemporary home baking due to a renewed interest in traditional foodways and natural ingredients.
If you’re looking to enhance your sourdough baking skills, you might find this article particularly helpful: Mastering the Art of Sourdough: Tips for Perfect Loaves Every Time. It offers valuable insights and techniques that can elevate your baking game, ensuring that each loaf you create is a delicious success.
The Sourdough Starter: A Living Ecosystem
At the heart of sourdough baking is the starter, a symbiotic culture of wild yeasts and lactic acid bacteria (LAB) flourishing in a mixture of flour and water. This living entity is responsible for producing the carbon dioxide that leavens the bread and the organic acids that contribute to its characteristic flavor profile.
Microorganisms at Play
The complexity of a sourdough starter lies in its microbial composition. While various species can be present, Saccharomyces cerevisiae, a common wild yeast, and several species of LAB, such as Lactobacillus sanfranciscensis and Lactobacillus plantarum, are dominant. These microorganisms exist in a delicate balance, with each contributing to the starter’s viability and eventual impact on the dough. Yeasts primarily produce ethanol and carbon dioxide, while LAB produce lactic acid and acetic acid. The ratio of these acids influences the bread’s tang and aroma.
Cultivating a Starter
Creating a sourdough starter from scratch involves combining flour and water and allowing ambient wild yeasts and bacteria to colonize the mixture. This initial stage requires daily feeding with fresh flour and water to encourage the growth of beneficial microorganisms while inhibiting undesirable ones. The process typically takes 5 to 10 days, during which the starter will show increasing activity, indicated by bubbling, expansion, and a pleasant sour aroma. Factors such as ambient temperature, type of flour, and water quality can influence the rate and success of starter development.
Maintaining a Starter
Once established, a sourdough starter requires ongoing maintenance, akin to caring for a perennial plant. Regular feeding, typically at least once a week if stored in the refrigerator, keeps the microbial population active and healthy. The feeding ratio (starter:flour:water) can be adjusted based on desired activity level and frequency of use. A well-maintained starter can last indefinitely, becoming a culinary heirloom passed down through generations.
The Sourdough Baking Process: A Journey of Transformation
Baking with sourdough is a multi-stage process that allows for the development of flavor, structure, and texture. Each step serves a crucial function in transforming simple ingredients into a complex loaf.
Autolyse and Mixing
The initial stage, often called autolyse, involves mixing flour and water and allowing it to rest. This brief period of hydration permits the flour to fully absorb water, initiating gluten development without mechanical action. Following the autolyse, the starter and salt are incorporated. Mixing then further develops the gluten network, creating the necessary structure to trap the gases produced during fermentation. Different mixing techniques, such as stretch and folds or kneading, are employed depending on the desired dough characteristics and baker’s preference.
Bulk Fermentation (First Rise)
Bulk fermentation, also known as the first rise, is a critical period during which the starter ferments the sugars in the flour, producing carbon dioxide and organic acids. This process is often punctuated by “stretch and folds,” where the dough is gently stretched and folded over itself at regular intervals. This technique strengthens the gluten structure, redistributes yeast and bacteria, and equalizes dough temperature. The duration of bulk fermentation is influenced by ambient temperature, starter activity, and desired flavor profile, typically lasting several hours. Observing the dough’s expansion and feel is crucial for determining the end of this stage.
Shaping and Proofing (Second Rise)
After bulk fermentation, the dough is gently divided and shaped into its final form. Shaping aims to create surface tension, which provides structure and helps the loaf hold its shape during baking. Following shaping, the dough undergoes a second rise, or proofing. This can be done at room temperature or, more commonly, in cold temperatures (cold proofing) in the refrigerator. Cold proofing slows down fermentation, allowing for a longer development of flavor and making the dough easier to handle. The duration of proofing varies significantly based on temperature and dough activity.
Baking
The final stage of sourdough baking involves baking the proofed dough. This typically occurs in a preheated oven, often with steam to create a crispy crust and allow for oven spring, the rapid expansion of the dough during the initial phase of baking. A Dutch oven or a baking stone with a water pan are common tools used to achieve these conditions. The high initial heat helps set the crust and encourages maximum rise. As baking progresses, the internal temperature of the bread rises, killing the microorganisms, developing crust color, and cooking the crumb.
Understanding Sourdough Characteristics
The beauty of sourdough lies in its inherent variability. No two loaves are exactly alike, and the baker’s choices throughout the process significantly influence the final product.
Flavor Profile
The characteristic tangy flavor of sourdough is primarily due to the lactic acid and acetic acid produced by the LAB in the starter. The ratio of these acids, influenced by factors like fermentation temperature and hydration, dictates the degree of sourness. Lactic acid contributes a milder, yogurt-like tang, while acetic acid provides a sharper, vinegary note. Longer, cooler fermentations generally lead to a more pronounced sourness. The type of flour used, particularly the use of whole grains, also contributes to flavor complexity.
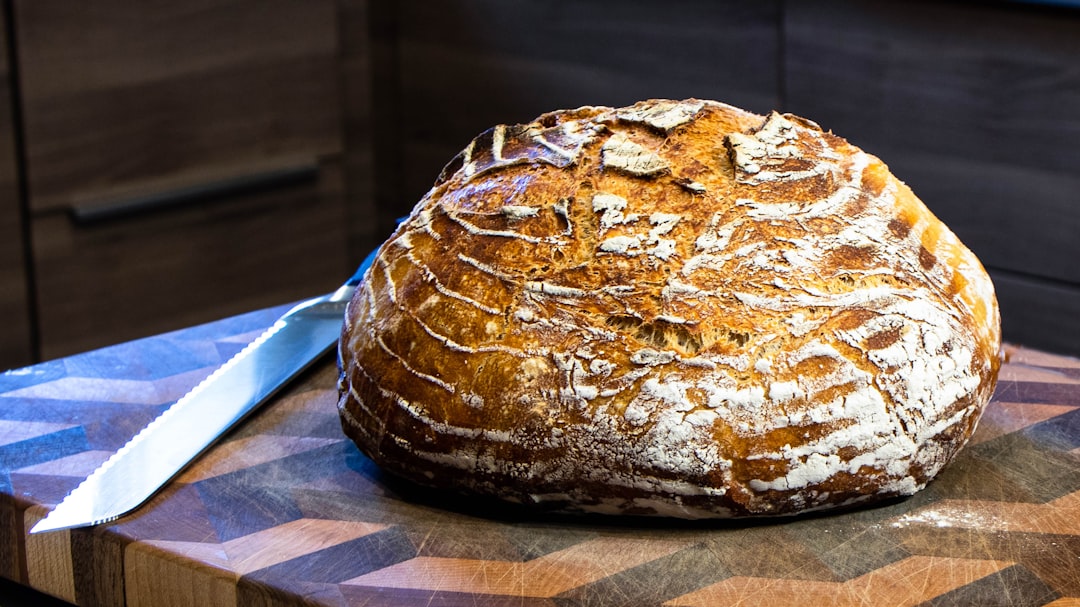
Texture and Crumb
Sourdough bread often exhibits a chewier texture compared to commercial yeast breads. This is attributed to the slow fermentation process, which allows for thorough gluten development. The crumb, or interior structure, can vary from a tight, uniform texture to an open, irregular one with large air pockets (alveoli). High hydration doughs and gentle handling during shaping tend to produce a more open crumb. The presence of a strong gluten network is paramount for trapping the gases that create these internal structures.
Crust Development
A hallmark of well-baked sourdough is its robust, often blistered crust. The interplay of high heat, steam, and sugars in the dough contributes to this development. Steam in the initial baking stages keeps the crust pliable, allowing the loaf to expand fully before the crust sets. The Maillard reaction, a chemical process between amino acids and reducing sugars, is responsible for the deep golden-brown color and complex flavors of the crust. A properly developed and baked crust protects the delicate interior and adds a textural counterpoint to the soft crumb.
If you’re looking to enhance your sourdough baking skills, you might find it helpful to explore the tips and techniques discussed in this insightful article on sourdough hydration levels. Understanding how hydration affects your dough can lead to better texture and flavor in your bread. For more information, check out the article here: sourdough calculator.
Flour and Hydration: The Foundation of Dough
| Metric | Typical Range | Notes |
|---|---|---|
| Hydration Level | 65% – 85% | Percentage of water relative to flour weight; affects crumb texture |
| Fermentation Time | 4 – 24 hours | Depends on temperature and starter activity; includes bulk and proofing |
| Starter Refreshment Ratio | 1:1:1 to 1:5:5 (starter:flour:water) | Determines starter strength and activity |
| Baking Temperature | 220°C – 250°C (425°F – 480°F) | High heat needed for good oven spring and crust development |
| Salt Percentage | 1.8% – 2.2% | Based on flour weight; enhances flavor and controls fermentation |
| Starter pH | 3.5 – 4.5 | Indicates acidity level; affects flavor and dough strength |
| Bulk Fermentation Temperature | 21°C – 27°C (70°F – 80°F) | Optimal range for yeast and bacteria activity |
| Loaf Weight | 500g – 1000g | Common sizes for home baking |
The choice of flour and the hydration level are fundamental decisions in sourdough baking, as they directly impact the dough’s handling properties, fermentation, and final bread characteristics.
Types of Flour
Different flours possess varying protein contents and milling characteristics, influencing gluten development and water absorption. Bread flour, with its higher protein content, is favored for its strength and ability to form a robust gluten network. Whole wheat flour introduces bran and germ, which add flavor and nutrition but can impede gluten development, requiring adjustments in hydration. Rye flour, with its low gluten-forming proteins, produces a denser loaf and is often used in combination with wheat flours. Experimenting with various flour combinations allows for a vast array of flavor and textural profiles.
Hydration Levels
Hydration refers to the ratio of water to flour in the dough, expressed as a percentage. A 70% hydration dough contains 700 grams of water for every 1000 grams of flour. Higher hydration doughs are stickier and more challenging to handle but can produce a more open, airy crumb. Lower hydration doughs are easier to manage and result in a denser, more uniform crumb. The optimal hydration level depends on the type of flour, ambient conditions, and the baker’s experience and preferences. Adjusting hydration by even a few percentage points can significantly alter the dough’s characteristics and the final product.
Troubleshooting Common Sourdough Issues
Even experienced bakers encounter challenges. Understanding common issues and their potential causes can help diagnose and rectify problems, leading to more consistent results.
Flat or Dense Loaf
A common frustration is a loaf that fails to rise adequately or has a dense, gummy interior. This can stem from several factors. An inactive starter, perhaps underfed or kept too cold, will not produce sufficient leavening power. Overproofing or underproofing the dough can also lead to a flat loaf; an overproofed dough may collapse in the oven due to exhausted gluten structure, while an underproofed dough lacks sufficient gas production. Weak gluten development, either from insufficient mixing or poor flour quality, will prevent the dough from trapping gas effectively.
Gummy Crumb
A gummy, unpleasant crumb can indicate underbaking. The internal temperature of the bread needs to reach approximately 200-210°F (93-99°C) for the starches to fully gelatinize and the crumb to set properly. Insufficient baking time or low oven temperature can contribute to this issue. Additionally, excessively high hydration for a given flour or shaping technique can sometimes lead to a denser, gummier interior.
Lack of Sourness
Some bakers desire a more pronounced tang in their sourdough. If your bread lacks sufficient sourness, consider adjusting your fermentation strategy. Longer, cooler bulk fermentations and cold proofing in the refrigerator encourage the lactic acid bacteria to produce more acetic acid, contributing a sharper tang. Using a whole grain flour in your starter or dough can also amplify the sour notes, as these flours provide more diverse nutrients for the LAB. Conversely, overly warm and short fermentations favor yeast activity, leading to a milder flavor profile. Consistent feeding and robust starter health are also fundamental to flavor development.